








Speedo Clocks Panel Stainless Steel Bolts & Clips Kit – Hyosung GT125R GT250R GT650R
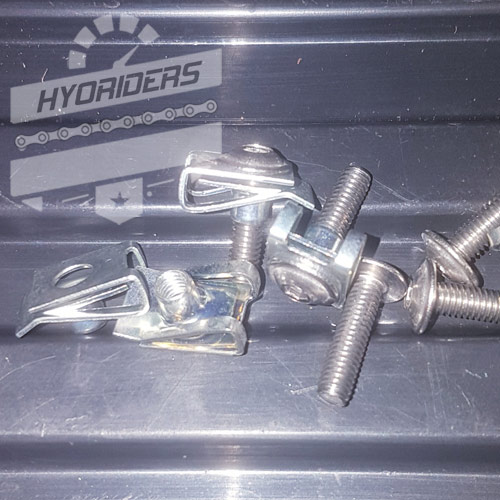
Ditch the rusty cross head screws in your eye-line and secure your dash shroud properly. This complete 16-piece kit replaces corroded original fasteners with premium unrustable Allen-key bits, making a fresh Hyosung speedometer bolts swap the smartest way to add clean styling to your cockpit during your next maintenance project.
- Material // 8x Marine-grade stainless steel hex drive bolts that are guaranteed never to rust, pit, or lose their shiny look.
- Clamps // Includes 8x premium bright zinc-plated steel clips that lock onto the fairing tabs for a rock-solid, rattle-free fit.
- Drive Upgrade // Swapping out the factory cross screws for hex drives completely rules out future tool stripping headaches.
- In Stock // Ready for your next styling mod. Full matching set to refresh your entire instrument panel surround piece.
In stock
Description
The main instrument cluster area on the sports bike range is surrounded by a sleek plastic trim panel that integrates directly into the front fairing lines. Unfortunately, the cheap factory hardware frequently rounds off or creates an absolute eyesore when it rusts into the metal fairing clips underneath. This slow maintenance reality turns a simple dashboard removal into a complete nightmare whenever you need to lift the panel to access your main clock assemblies or wiring loops. Our UK-assembled Hyosung speedometer bolts package provides an un-complicated drop-in solution. By combining marine-grade stainless fasteners with high-tension spring clips, this bundle keeps your panels easily removable while introducing a polished custom styling accent straight to your cockpit view during your restoration project.
Upgrading your bike to this hex head drive kit completely eliminates the risk of tool slippage. Standard cross screws strip out immediately under torque, but these tough allen bolts handle hand tools beautifully without scoring. The included steel fasteners feature a bright zinc plating that actively fights off harsh winter rain and condensation, holding the plastic cover lines under perfectly steady tension so you can enjoy a rattle-free ride on everyday journeys.
💎 FAIRING HARDWARE HYOSUNG SPEEDOMETER BOLTS SPECIFICATIONS
| Marine Grade StainlessEight premium hex drive bolts that resist water corrosion and keep their clean look permanently. | High-Tension Steel ClipsEight bright zinc-plated speed fasteners that squeeze the inner fairing tabs tightly to block vibrations. |
| No More Stripped ScrewsUpgraded socket heads that deliver a slip-free bit grip for fast hand wrench adjustments on the bench. | True Factory BlueprintSized accurately to clear the dashboard shroud recesses to replace factory codes: 94641HP9200 or H94641HC9700. |
📜 Confirmed Fitment Guide
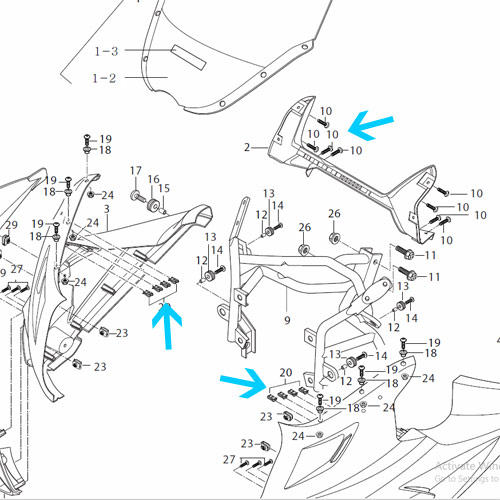
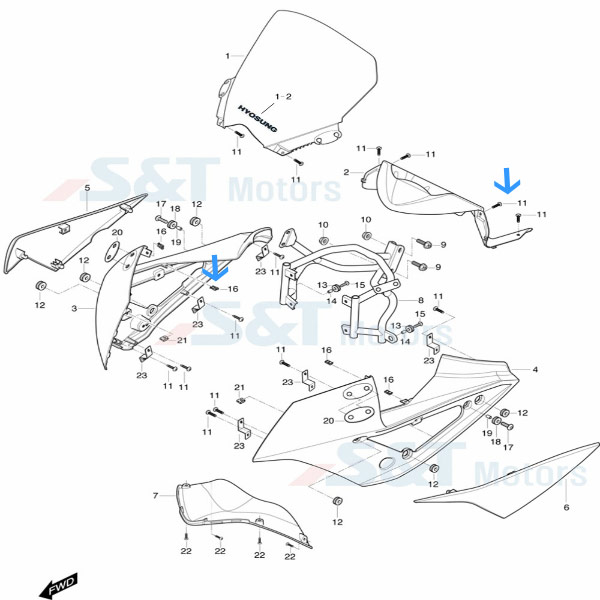
Hyosung Models: Hardware counts and panel dimensions are verified strictly for the standard fairing configurations listed below. See the diagram picture for instrument cowl alignment pins.
- GT125R / GT125RC: 2005 to 2019.
- GT250R / GT250RC: 2005 to 2019.
- GT650R / GT650RC: 2005 to 2019.
🔧 Installation Tips
- Pre-Soak Sticky Original Fasteners: If your original factory screws are heavily rusted or packed with road salt, apply a single drop of penetrating oil directly to the heads ten minutes before you try to unbolt them. This simple step protects your fragile inner fairing plastics from cracking under pressure.
- Align the Clips Fully Square: Slide the fresh zinc speed clips fully home onto the plastic fairing receptor tabs before you try to thread your new stainless bolts. Ensuring the metal openings are centered prevents cross-threading on the bench.
- Tighten Until Snug: Thin dashboard panels can easily shatter if you apply brute force with hand tools. Wind the stainless hex bolts down gently until the plastic trim feels completely secure and rattle-free against the frame, then stop turning.
Additional information
| Weight | 0.5 kg |
|---|---|
| Dimensions | 20 × 20 × 2 cm |
You must be logged in to post a review.
GARAGE PICKS // ADD TO BUILD
-

NGK LASER Iridium Spark Plugs x2 – Hyosung GT/GV 125 250 650 Models
£29.99 -

NGK Uprated HT Coil Spark Plug Cap/Covers [x2] – Hyosung GTR GT GV (Various Models)
£34.99 -

Upgrade Regulator Rectifier [Big Heatsink] – Hyosung GT/GV 125 250 Carb Models
£39.99 -

Aftermarket Ignition Coil – Carby Hyosung GV125 GT125 GV250 GT125R GT250
£29.99
EXPLORE // RELATED PRODUCTS
-

Stainless Steel Top Diaphragm Cover Carb Bolts Kit – Hyosung GV125 GT125R GT125 GT250 GV250
£4.99 -

Magnetic Oil Drain Plug [Sump Bolt] – Hyosung GV300S
£9.99 -
![Oil Drain Plug [CNC Magnetic Sump Bolt] - Hyosung GV125S Injected EFi](https://i0.wp.com/hyoriders.club/wp-content/uploads/2020/04/xgv125sdraincnc.jpg?fit=362%2C362&ssl=1)
Magnetic Oil Drain Plug [Sump Bolt] – Hyosung GV125S Bobber EFi
£14.99 -

Aftermarket Rear View Mirrors [Round Side] – Hyosung GT125R GT250R GT650R
£25.99
Independent Shop supplying ride enhancements, quality spares and service kits. Need Owners Books? Click 'Manuals' at the top of the site!
Reviews
There are no reviews yet.