
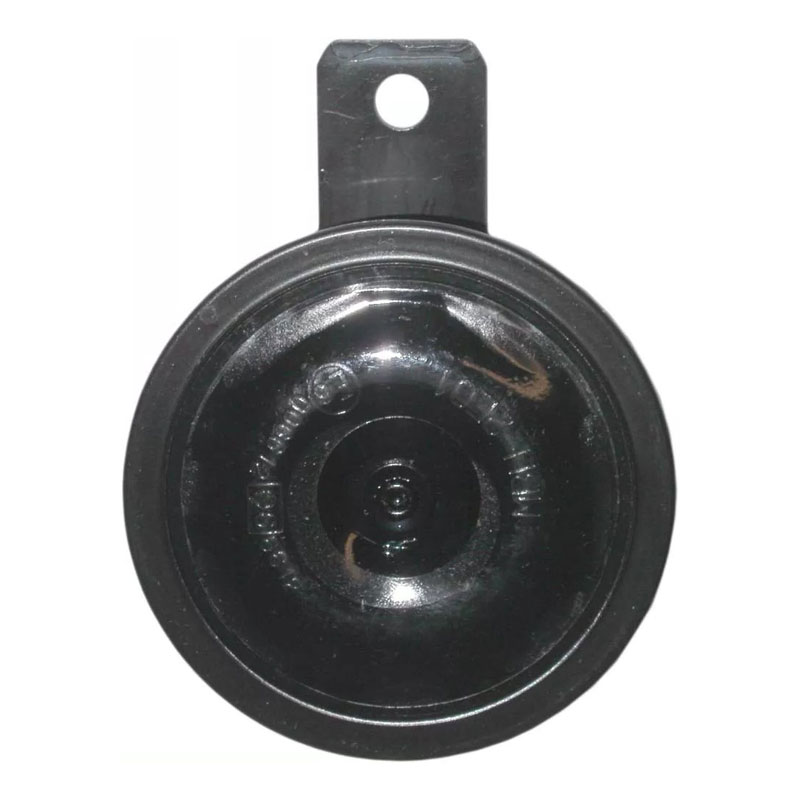
12V Klaxon Horn (Hooter Beeper) – Various Hyosung Models
Bring the alert audio back to your bike setup. This affordable aftermarket 12V replacement directly swaps out tired, water-damaged, or completely silent factory units. A clear horn is essential insurance on the road to make sure distracted drivers notice you before pulling out.
- Road Safety // Ensures you remain clearly audible in tight everyday traffic.
- Direct Fit // Simple plug-and-play spade spade connector swap with no wiring splices.
- UK MOT Pass // Needed for your annual roadworthy check.
- Universal Fit // Wide component compatibility across 125cc, 250cc, and 650cc frames.
Description
A silent warning button isn’t just an irritation; it’s a major safety hazard when distracted car drivers look right through your machine. This robust 12-volt aftermarket replacement restores your primary line of communication on the tarmac while ensuring your bike comfortably satisfies local roadworthiness and legal inspection mandates.
💎 Technical Performance Spec
| Loud & Clear ToneHigh-output 12V diaphragm tuned for optimal acoustic penetration. | Direct Terminal SwapMatches the original mounting spacing and standard spade lugs. |
| Durable Shell BuildCoated metal housing engineered to handle ongoing road grime. | Chassis AdaptabilityVersatile horn disc layout that bolts straight to factory brackets. |
📜 Model Fitment Guide
Confirmed Chassis Matches: Fits GT125, GT125R, GT125P, GT250, GT250R, GT650R, GV125, GV250, GV650, ST7, GD250R, GD250N, and RT125D models.
38500HM8110 (Interchanges with standard 12-volt grounding configurations across production years 2001 to 2020+)
If your current horn remains completely dead, remember to test for a corroded left handlebar switch assembly or broken copper strands in the loom.
🔧 Install Tips
- Weatherproofing Terminals: Because the bracket sits right behind the front wheel, rub down the wire tips and apply a smear of anti-corrosion block grease to block moisture.
- Ditch the Wrong Sprays: Avoid using general multi-purpose lubricating oils on live electrical plugs. Use a proper fast-evaporating cleaning fluid that leaves zero film behind.
- Clearance Check: Ensure the disc face doesn’t firmly press flat against any plastic fairing panels or radiator guards, or the physical vibration will be muffled.
If you want to trace down an annoying wiring fault or double-check your bike’s earth point layout, or For wiring diagrams, diagnostic write-ups, head to the forums.
Additional information
| Weight | 1 kg |
|---|---|
| Dimensions | 10 × 10 × 7 cm |
You must be logged in to post a review.
GARAGE PICKS // ADD TO BUILD
-

520 Upgrade Chain & Sprocket Set (Full Conversion Kit) – Hyosung GV125 Carby Aquila
£95.99 -

Premium 520 Chain Sprocket Kit – Hyosung GT125R GT125 GT250
£74.99 -

SwingArm Spool Kit {Race Stand Bobbins Sliders} – Hyosung GT125 GT250 GT125R GT250R
£34.99 -

Brake Stop Light & Clutch Lever Switch – Hyosung GV125 GV250
£12.99
EXPLORE // RELATED PRODUCTS
-

Magnetic Oil Drain Plug [Sump Bolt] – Hyosung GV125 GT125R GV GT250 GV650 GT650 RX RT 125
£9.99 -

Fuel Tank Cushion [Rubber Dampers] – Hyosung GTR GT GV (Various Models)
£7.99 -

Japan D.I.D Cam Shaft Chain – Hyosung GT250 GV250 RX125 RT125
£79.99 -

EBC Heavy Duty Clutch Plates Friction Drive Overhaul Kit – Hyosung GT125R GV125 GT125 XRX125 RT125D GA125
£65.99
Independent Shop supplying ride enhancements and quality spares with fast dispatch. Need assistance? Access our workshop guides, manuals, tutorials or drop by the forums for troubleshooting help.
Reviews
There are no reviews yet.